19 May 2009
Summertime!
Hello, blogging world! Yes, I'm still here -- I've graduated from college and I'm still attempting to unwind and recover from the past month. I have plenty of updates looming and they will be coming soon.
16 March 2009
My first attempt at bagels!
I'm a big fan of good breakfast food, but I'm not talking cereal and toast. Give me pancakes, bacon, fruit & yogurt, hashbrowns, omelets - any of those make for a very happy breakfast but, unfortunately, aren't suited for a quick breakfast. When I need something quick, filling, and satisfying I go for bagels. I struggle to resist a fresh toasted bagel at work every morning and the temptation of stopping at Tim Horton's for a bagel is always there. That's what drove me toward my first Spring Break culinary undertaking - homemade bagels.
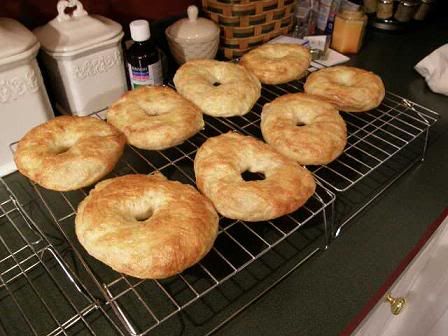
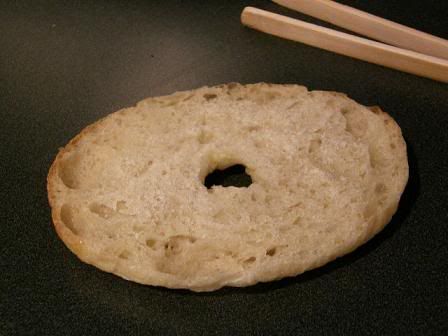
My mom was incredibly skeptical and my dad laughed at me [as usual], but I felt like they had every right to react in those ways. I'm not very experienced when it comes to working with yeast and who decides to make bagels at home? Well let me say this - I showed them! I'm definitely impressed with my finished product. Sure, they weren't as fluffy as your typical bagel, but they were delicious and had a great texture & flavor! While a bit time consuming, they weren't really that difficult to make either and I will definitely do it again. Mom and Dad enjoyed them simply toasted with butter and jelly [it always has to be Knott's at our house - my dad is a serious addict] but I used mine to make a delicious fried egg sandwich with a little cheese.
1 tbsp active dry yeast
1 tbsp sugar
1 3/4 cups water, warm (100-110F)
4-5 cups bread flour (not all purpose)
1 tbsp salt
1 egg, for egg wash
1 tbsp sugar
1 3/4 cups water, warm (100-110F)
4-5 cups bread flour (not all purpose)
1 tbsp salt
1 egg, for egg wash
Optional Seasonings:
Poppy Seeds
Onion Powder
Caraway
Sesame Seeds
Kosher Salt
Poppy Seeds
Onion Powder
Caraway
Sesame Seeds
Kosher Salt
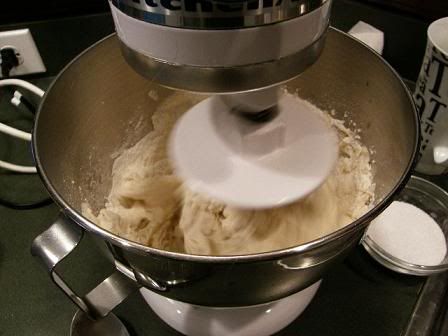
In a large bowl [or the bowl of a stand mixer, which I prefer] combine yeast, sugar and water. Let stand for 5 minutes, then stir in the flour and salt. Mix dough thoroughly until it comes together in a large ball, pulling away from the sides of the bowl. Add an additional tablespoon of flour or water, if needed. I think I should have added a little more flour at this point but I was afraid of adding too much, which made my dough sticky.
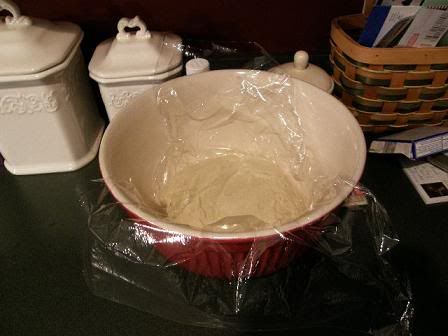
If kneading by hand, turn dough out onto a lightly floured surface and knead until very smooth and elastic, about 10 minutes. If using a stand mixer [like I did], knead the dough with the dough hook until elastic, about 8 minutes on a low speed. Place dough in a lightly greased bowl, cover with plastic wrap and let rise for 1 hour, or until doubled in size.
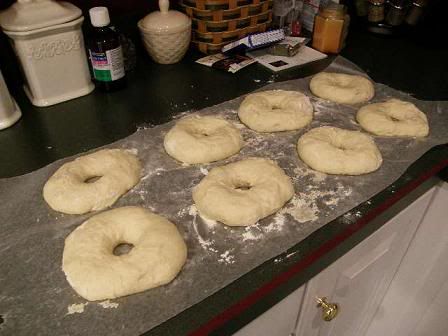
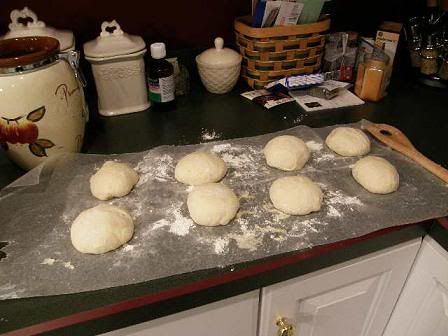
When dough has risen, turn the dough out onto a very lightly floured surface and divide into 8 equal pieces (first quarters, then halves). Shape each piece into a tight ball, pinching the corners together at the bottom of the dough. When all the balls are shaped, let the dough rest for 30 minutes covered with a clean dish towel.
Once dough balls have rested, use your fingers to poke a hole through the center of each dough ball. Stretch out the dough into a ring with your fingers and be sure to make the hole a little larger than you want the finished bagel to have, as it will shrink slightly while the bagel is expanding during the baking process. Let bagels rest for about 10 minutes.
Once dough balls have rested, use your fingers to poke a hole through the center of each dough ball. Stretch out the dough into a ring with your fingers and be sure to make the hole a little larger than you want the finished bagel to have, as it will shrink slightly while the bagel is expanding during the baking process. Let bagels rest for about 10 minutes.
Meanwhile, bring a large pot of water to a gentle boil and preheat the oven to 400F. I used a deep dish skillet because it’s wider and the bagels need quite a bit of space. Line a baking sheet with paper towels and another baking sheet with parchment paper sprinkled with cornmeal (if you have it - I didn‘t and everything worked out fine without).
Working two to four bagels at a time (depending on what you can fit into your pot or skillet), drop the bagels carefully into the boiling water. Boil for 2 minutes on each side. Using a slotted spoon or strainer, transfer bagels to the paper towels to drain for a moment, then place on the parchment-lined baking sheet. Repeat process with remaining bagels.
Brush boiled bagels with lightly beaten egg (a pastry brush is a good tool for this) and sprinkle with seasonings. Bake for 24 minutes, or until golden brown. Cool completely on a wire rack. Slice and toast to serve.
Brush boiled bagels with lightly beaten egg (a pastry brush is a good tool for this) and sprinkle with seasonings. Bake for 24 minutes, or until golden brown. Cool completely on a wire rack. Slice and toast to serve.
I have some more updates coming soon, I promise. I'm in my last 7 weeks or so of college, so I don't have a lot of spare time for blogging. When I do get the time, expect to see bread, cupcakes, and soup!
15 January 2009
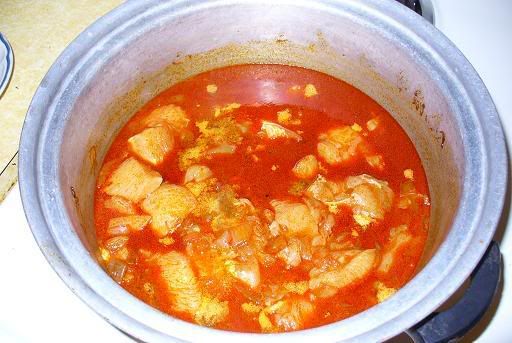
Chicken Paprikas
It's time for a change. I've been posting sweet recipe after sweet recipe and I guess I now feel the need to showcase my cooking chops.
Chicken Paprikas is so much more than a meal to me. It is full of memories and makes me feel at home. My gram makes the best chicken paprikas I have ever tasted and, one day, I will get the recipe. I have so many memories of the entire family getting together at Gram's to eat heaping plates of this chicken, served over her homemade spaetzel, and visit with one another. Unfortunately, we've all gotten busier and this tradition has fallen to the wayside but it is one that I have never forgotten.
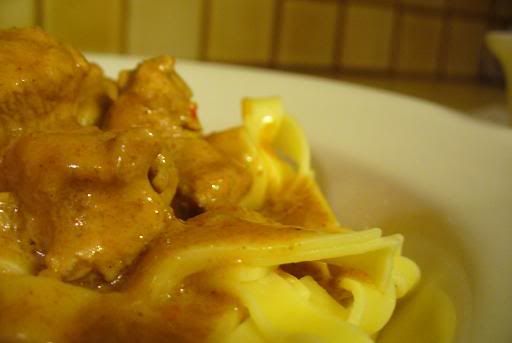
One day I was hit with an undeniable craving for this comforting, hearty meal and was quickly on a mission to make some for dinner. Bryce gladly offered up his kitchen, knowing he'd benefit from my kitchen excursion. I turned to allrecipes.com and sifted through each recipe until I found one that I felt would be a keeper. Boy, was I right. While it wasn't quite Gram's [maybe my memory is a bit biased...], it was exactly what I wanted - rich, creamy, flavorful, and comforting. I served our meal over noodles but I would definitely recommend using spaetzel if possible.
Chicken Paprikas
adapted from allrecipes.com - Chicken Paprikas II
2 tablespoons olive oil
1 large onion, diced
3 cloves garlic, diced
3/4 teaspoon salt
1 teaspoon hot sauce
3 heaping tablespoons paprika
2 pounds boneless, skinless chicken breasts, cut into 1-inch cubes
1 cup reduced sodium chicken broth
1 14.5 ounce can diced tomatoes
2 tablespoons flour
1 8 ounce container sour cream
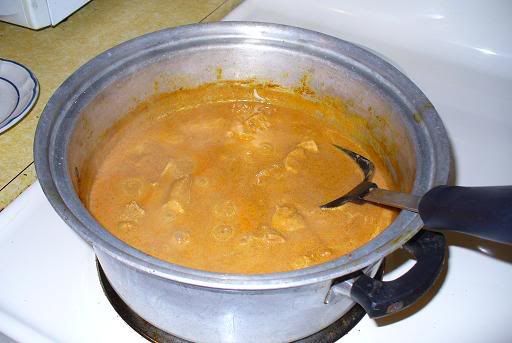
Heat the olive oil in a large skillet over medium heat. Add the onion, garlic, salt, hot sauce, and paprika. Stir together and saute until the onions are translucent. Add the chicken and cover with the broth [add some water if chicken is not completely covered]. Stir together and cook over medium heat for 30 minutes.
Stir in tomatoes [if desired - I left them out], reserving the liquid. Stir about half of the liquid from the tomatoes with flour and sour cream in a medium bowl and mix until well blended. Slowly add mixture to the chicken, stirring constantly. Cook until thickened. Serve over noodles, rice, or spaetzel.
The dish is simple and delicious, and I highly recommend it!

Chicken Paprikas is so much more than a meal to me. It is full of memories and makes me feel at home. My gram makes the best chicken paprikas I have ever tasted and, one day, I will get the recipe. I have so many memories of the entire family getting together at Gram's to eat heaping plates of this chicken, served over her homemade spaetzel, and visit with one another. Unfortunately, we've all gotten busier and this tradition has fallen to the wayside but it is one that I have never forgotten.
One day I was hit with an undeniable craving for this comforting, hearty meal and was quickly on a mission to make some for dinner. Bryce gladly offered up his kitchen, knowing he'd benefit from my kitchen excursion. I turned to allrecipes.com and sifted through each recipe until I found one that I felt would be a keeper. Boy, was I right. While it wasn't quite Gram's [maybe my memory is a bit biased...], it was exactly what I wanted - rich, creamy, flavorful, and comforting. I served our meal over noodles but I would definitely recommend using spaetzel if possible.
Chicken Paprikas
adapted from allrecipes.com - Chicken Paprikas II
2 tablespoons olive oil
1 large onion, diced
3 cloves garlic, diced
3/4 teaspoon salt
1 teaspoon hot sauce
3 heaping tablespoons paprika
2 pounds boneless, skinless chicken breasts, cut into 1-inch cubes
1 cup reduced sodium chicken broth
1 14.5 ounce can diced tomatoes
2 tablespoons flour
1 8 ounce container sour cream
Heat the olive oil in a large skillet over medium heat. Add the onion, garlic, salt, hot sauce, and paprika. Stir together and saute until the onions are translucent. Add the chicken and cover with the broth [add some water if chicken is not completely covered]. Stir together and cook over medium heat for 30 minutes.
Stir in tomatoes [if desired - I left them out], reserving the liquid. Stir about half of the liquid from the tomatoes with flour and sour cream in a medium bowl and mix until well blended. Slowly add mixture to the chicken, stirring constantly. Cook until thickened. Serve over noodles, rice, or spaetzel.
The dish is simple and delicious, and I highly recommend it!
07 January 2009
Paula Deen's Cookie Dough Truffles
When my mom told me about this recipe, I thought it would be love at first bite. I'm a cookie dough fanatic and dipping cookie dough in chocolate? Divine! Weeellll...they're okay. They're soft and sweet, but, believe it or not, a little too sweet for me. Now don't get me wrong - I've eaten my fair share of the truffles but I'd rather spend my calories on other cookies. Also, these require a lot of work. I'll stick with kifli if I want a labor intensive cookie.
Cookie Dough Truffles
from the kitchen of Paula Deen
1/2 cup butter, softened
3/4 cup firmly packed brown sugar
1 tsp vanilla extract
2 cups all-purpose flour
1 14-ounce can sweetened condensed milk
1/2 cup semisweet mini chocolate chips
1 1/2 pounds chocolate bark candy coating, melted
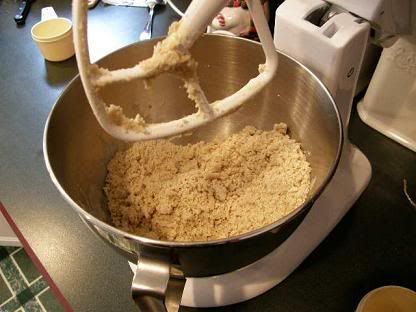
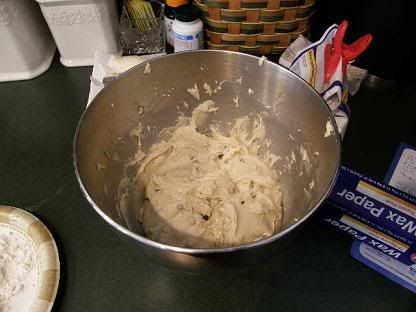
In a large bowl, cream butter and brown sugar with an electic mixer at medium speed until creamy. Add vanilla and mix. Gradually beat in flour, then add in the milk. Add in the chocolate morsels, mixing well. At this point, I put the dough in the freezer for a few hours because the dough is INCREDIBLY sticky.
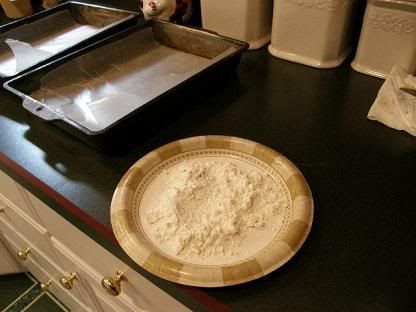
Remove the dough from the freezer and shape into 1-inch balls. I coated my hands in flour before doing so and re-coated between cookie dough balls. Place the balls on waxed paper and freeze for at least 2 hours.
Melt the chocolate in a double boiler, or in a glass bowl set over a pot of gently simmering water. Using two forks, dip the cookie balls into the chocolate to cover. Place on waxed paper and chill, at least one hour, to set.
Like I said, these were pretty labor intensive and while I liked trying a new recipe I don't think I would make these again. I also saw another blogger's take on the truffles and she recommened using salted butter, which I think may help cut back on the sweetness.
Again, no pictures of the finished product. Mine didn't look that great and I'm sure I was up to my elbows in other baking at the moment. Just imagine those, but dipped in dark chocolate [which I think provided a nice, bitter contrast to the sweet dough] and kind of lumpy.
04 January 2009
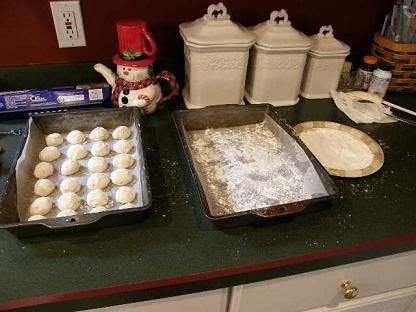
M&M Cookies
These cookies are a Christmas cookie staple in my family's house. Growing up, I always preferred the Tollhouse chocolate chip cookies but these have recently won my heart. They are buttery and soft, and the M&Ms provide a nice, chocolatey crunch. Bryce and I often argue over whose mom makes the best M&M cookies and I will stand by these time and time again. There's something special and different about these cookies which may come from the use of all brown sugar rather than granulated sugar.
Chocolate Chipper Champs [I have no idea why they are called by that name...]
from the kitchen of my Aunt Colleen
from the kitchen of my Aunt Colleen
3/4 cup softened butter or margarine
1 1/3 cups packed brown sugar
1 teaspoon vanilla
2 eggs
2 1/4 cups flour
1 teaspoon baking soda
1/2 teaspoon salt
1 cup M&M plain candies, plus some to place on top
1 1/3 cups packed brown sugar
1 teaspoon vanilla
2 eggs
2 1/4 cups flour
1 teaspoon baking soda
1/2 teaspoon salt
1 cup M&M plain candies, plus some to place on top
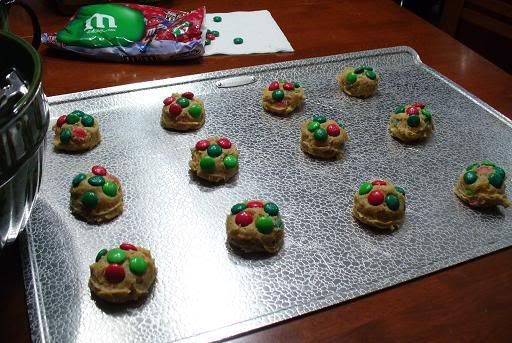
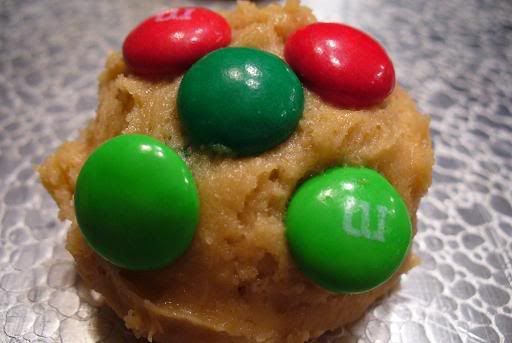
Preheat the oven to 350 degrees Fahrenheit. Mix brown sugar, butter, vanilla, and eggs in a large bowl until well-blended. Combine the dry ingredients in a large bowl, then stir into the butter and sugar mixture. Stir in the M&M candies by hand, then drop by rounded tablespoonfuls about 3 inches apart onto a lightly greased cookie sheet. Press 3 to 5 more M&Ms onto each cookie if desired [do it - this makes the cookies look nicer and gives a little extra chocolate]. Bake until light brown, about 10 to 12 minutes. Cool slightly then remove to a wire rack to cool completely.
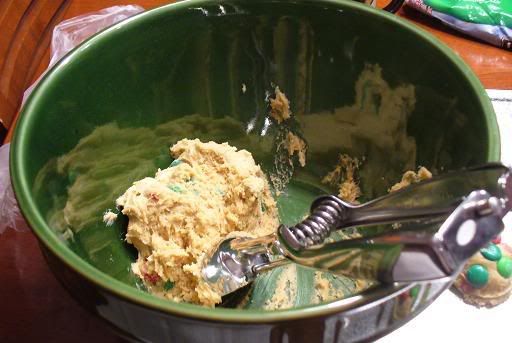
One suggestion - use an ice cream scoop/cookie dough scoop if you have one. This makes things so much easier.
I don't have any pictures of the finished product, but I think the cookie dough pictures look good enough.
Subscribe to:
Posts (Atom)

